Professional solar installations are getting more expensive, but you can build your own system for much less. Many people think solar setup is too complicated, but it’s actually quite simple when broken into steps.
This guide shows you how to choose and connect solar panels, batteries, a charge controller, and inverter in 7 easy steps. With basic tools and this walkthrough, you’ll have a working solar battery system that saves you money and provides reliable backup power.
Key Components For Your Solar Setup
A simple solar battery setup requires several key components to function effectively. These parts work together to capture, store, and distribute solar energy for various applications.
- Solar Panels are the primary component that converts sunlight into electrical energy. Most residential setups use photovoltaic (PV) panels, which come in different sizes and wattages depending on energy needs.
- Charge Controllers protect batteries from overcharging and excessive discharge. These devices regulate the voltage and current coming from the solar panels, ensuring optimal battery health and performance.
- Battery Bank stores the captured solar energy for later use. Deep-cycle batteries are ideal for solar systems because they’re designed to be regularly discharged and recharged.
Popular battery types include:
- Lead-acid (affordable but shorter lifespan)
- Lithium-ion (longer lifespan, more efficient, but costlier)
- AGM/Gel (maintenance-free, spill-proof options)
For smaller residential or off-grid setups, consider Deye’s Low Voltage Series with a modular design, natural cooling, and over 6000 cycles of reliable storage.
- Inverters transform the DC (direct current) power stored in batteries into AC (alternating current) power that most household appliances use. The size needed depends on how many devices you plan to power simultaneously.
- Mounting Hardware secures solar panels to rooftops, ground mounts, or other structures. Proper mounting ensures optimal sun exposure and protects panels from environmental damage.
- Wiring and Connectors link all components together. Quality cables and connectors reduce energy loss and minimize fire risks.
- Monitoring Systems help track energy production and consumption. These optional but valuable tools allow users to optimize their system’s performance and identify potential issues early.

Step 1. Calculate The Load
Before purchasing any components for your solar battery setup, you need to determine how much power your devices will consume. This calculation forms the foundation of your entire system.
Start by listing all electrical devices you plan to power with your solar setup. Common items include lights, fans, laptops, phones, and small appliances.
Next to each device, note its power consumption in watts. This information is typically found on a label attached to the device or in its user manual.
Sample Power Consumption Table:
| Device | Watts | Hours Used/Day | Watt-Hours/Day |
| LED Light | 10W | 5 hours | 50Wh |
| Laptop | 60W | 3 hours | 180Wh |
| Phone Charger | 5W | 2 hours | 10Wh |
| Small Fan | 25W | 4 hours | 100Wh |
| Total | 340Wh |
Multiply each device’s wattage by the number of hours you expect to use it daily. This gives you watt-hours (Wh), the energy consumption per day.
For devices that list amps instead of watts, use this formula: Watts = Volts × Amps. Most household devices run on 120V in the US.
Add a 20% buffer to your total for system inefficiencies and unexpected usage. In our example, 340Wh + 20% = 408Wh daily energy requirement.
This final number will help determine the battery capacity and solar panel size needed for your system.
Step 2: Preparing The Batteries
Proper battery preparation is crucial for a successful solar power system. Begin by inspecting each battery for any physical damage, including cracks, leaks, or corrosion. Clean the terminals using a mixture of baking soda and water to remove any existing corrosion.
For lead-acid batteries, check the electrolyte levels if they’re not sealed units. Add distilled water if needed, but never use tap water as minerals can damage the battery cells. Remember to wear protective gloves and eyewear when handling batteries.
Battery Configuration Options:
- Series connection: Increases voltage while maintaining the same capacity
- Parallel connection: Increases capacity while maintaining the same voltage
- Series-parallel: Combines both approaches for higher voltage and capacity
Measure each battery’s voltage with a multimeter to ensure they’re at similar charge levels before connecting them. Significant differences in charge levels can cause performance issues when batteries are connected.
Label each battery with its installation date and specifications for future reference. This practice simplifies maintenance and replacement schedules.
Ensure the batteries are placed in a well-ventilated area away from direct sunlight. Extreme temperatures can significantly reduce battery lifespan and performance. A temperature-controlled environment between 68°F and 77°F (20°C to 25°C) is ideal.
Connect batteries using appropriately sized cables that can handle the expected current. Thicker cables (lower gauge numbers) reduce resistance and heat buildup during charging and discharging cycles.
Step 3: Place Batteries In Container
Once the batteries are properly wired together, they need to be securely placed in the container. This step is crucial for safety and efficient operation of your solar battery setup.
First, ensure the container is clean and dry. Any moisture or debris could cause electrical issues or damage to the batteries.
Line the bottom of the container with a non-conductive material such as rubber matting. This helps prevent vibration damage and provides insulation.
Important safety note: Always wear gloves when handling batteries to protect yourself from potential chemical exposure.
Place the batteries in the container with enough space between them for proper ventilation. Overheating can significantly reduce battery life and performance.
The batteries should be arranged in a way that makes the terminal connections easily accessible. This will simplify future maintenance and troubleshooting.
Secure the batteries with non-conductive straps or braces to prevent movement. Movement during transportation or from vibration can damage the connections and the batteries themselves.
Temperature consideration: Batteries function best between 68-77°F (20-25°C). If possible, place your container in a location with relatively stable temperatures.
Check that all connections remain tight and secure after placing the batteries. Loose connections can cause power loss or potentially dangerous situations.
Step 4: Creating The Jumpers
Jumper cables are essential components that connect the solar panel to the charge controller and the battery. These connections ensure proper electricity flow throughout the system.
To create effective jumpers, gather 10-gauge wire for smaller systems or 8-gauge wire for larger setups. You’ll also need wire strippers, heat shrink tubing, and appropriate connectors for your specific components.
Begin by measuring the required lengths between components. Always add an extra 2-3 inches to accommodate any adjustments that might be needed later.
Tools needed:
- Wire cutters/strippers
- Heat gun
- Crimping tool
- Heat shrink tubing
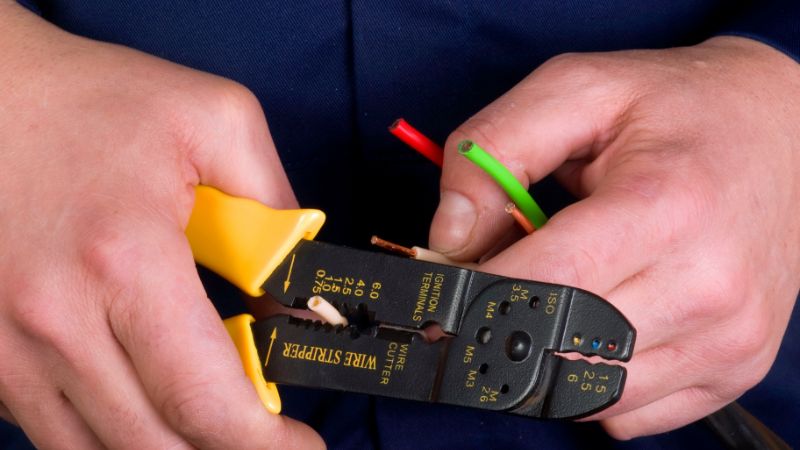
Strip about ¾ inch of insulation from each end of the wire. Twist the exposed copper strands tightly to prevent fraying. Slide a piece of heat shrink tubing onto the wire before attaching connectors.
Crimp the appropriate connectors to each end based on your system requirements. MC4 connectors are commonly used for solar panel connections, while ring terminals work well for battery terminals.
Use the heat gun to shrink the tubing over the connection points. This provides insulation and strain relief for the connections.
Label each jumper clearly with its function (e.g., “Panel to Controller,” “Controller to Battery”). This simple step prevents confusion during installation and future maintenance.
Test each completed jumper with a multimeter to ensure proper continuity before installing them in your solar battery system.
Step 5: Preparing The Lid
The lid of your battery box requires careful preparation to accommodate the solar components while maintaining protection from the elements. Begin by measuring and marking where your charge controller and any cable entry points will be positioned.
Using a drill with the appropriate bit size, create holes for mounting the charge controller. Make sure these holes align perfectly with the mounting brackets on your controller.
For cable entry points, use rubber grommets to protect wiring from sharp edges. These inexpensive components prevent cable damage and potential short circuits over time.
Materials needed:
- Drill with various bit sizes
- Rubber grommets (appropriate for your cable thickness)
- Permanent marker
- Measuring tape
- Jigsaw (if larger cutouts are needed)
Apply silicone sealant around any openings to ensure waterproofing. This step is crucial for outdoor installations where moisture could damage electronic components.
If your setup includes monitoring displays, carefully measure and cut appropriately sized viewing windows. Consider using clear acrylic sheets secured with silicone to maintain visibility while preserving weather resistance.
Test-fit all components before final installation. This prevents frustrating adjustments later when components are wired and more difficult to reposition.
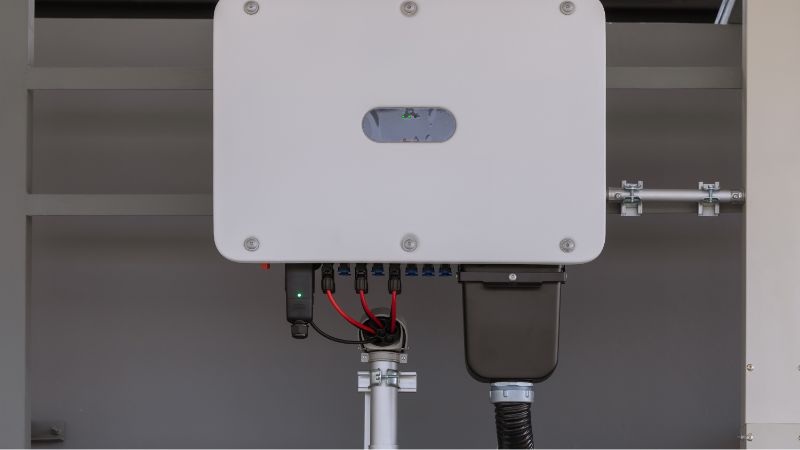
Step 6: Connecting The Charge Controller And Inverter To The Batteries
Connecting the charge controller and inverter to batteries is a critical step that requires careful attention to polarity and proper cable sizing. Safety first: Always wear insulated gloves and remove jewelry before handling battery connections.
Start by identifying the positive and negative terminals on both the batteries and charge controller. The terminals are typically color-coded (red for positive, black for negative) and marked with + and – symbols.
Connect the charge controller to the batteries first. Use properly sized cables based on your system’s current requirements. Thicker cables (lower gauge numbers) are needed for higher current systems.
Important: Always connect the negative terminal last and disconnect it first when working with batteries to prevent accidental short circuits.
For the connection sequence:
- Attach the positive cable from the charge controller to the battery’s positive terminal
- Connect the negative cable from the charge controller to the battery’s negative terminal
- Tighten all connections firmly but don’t overtighten
Next, connect the inverter to the batteries using a similar approach. The inverter typically requires heavier gauge cables than the charge controller due to higher current demands.
Apply anti-corrosion paste to battery terminals to prevent oxidation. This simple step extends the life of connections and improves conductivity.
Check all connections twice before powering on the system. Loose connections can cause voltage drops, system inefficiency, or even fire hazards.
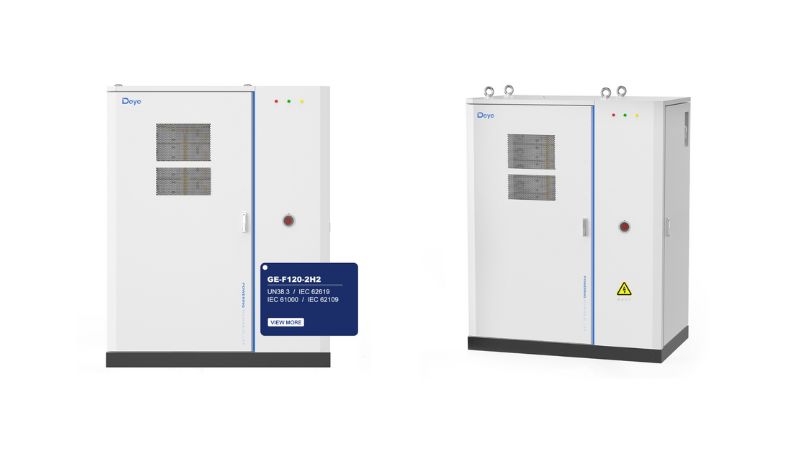
For a seamless connection between batteries, charge controllers, and inverters, explore Deye’s all-in-one solutions like the GE-F120-2H2 module, which offers a hassle-free approach to system integration and transition to backup power within milliseconds.
Step 7: Final Set Up And Test
After connecting all components, it’s time to finalize the solar battery setup and ensure everything works properly. Place the battery in a cool, dry location away from direct sunlight and extreme temperatures.
Double-check all connections to verify they’re secure and properly insulated. Loose connections can cause power loss or potentially dangerous situations, so take your time with this step.
Testing Procedure:
- Check battery voltage with a multimeter
- Verify solar panel is generating power
- Confirm charge controller is functioning
- Test load operations
Monitor the system for at least 24 hours to ensure the battery charges during daylight and discharges properly when powering devices. The charge controller should display relevant information about the system’s status.
Important safety checks: Look for any unusual heating in wires or components. Listen for buzzing or other strange noises that might indicate electrical problems.
Keep a maintenance log to track system performance. Note the battery’s voltage at different times and how well it powers your devices.
Consider adding a simple monitoring system if your setup doesn’t include one. This can be as basic as a voltage display or as sophisticated as a wireless monitoring solution.
Most systems require minimal maintenance beyond occasional cleaning of solar panels and checking connections every few months. With proper care, your simple solar battery system should provide reliable power for years.
Frequently Asked Questions (FAQ)
Q: How much does a basic DIY solar battery system cost?
A: A simple starter system typically costs between $500-$2,000 depending on capacity and component quality. A basic 400Wh system with one 100W panel, charge controller, 100Ah battery, and small inverter runs around $600-$800. Higher capacity systems with lithium batteries can cost $1,500-$3,000 but offer better performance and longevity.
Q: How long will my batteries last?
A: Battery lifespan varies by type and usage. Lead-acid batteries typically last 3-5 years with proper maintenance, while lithium-ion batteries can last 10-15 years. Factors affecting lifespan include depth of discharge, temperature, charging habits, and overall maintenance quality.
Q: Can I expand my system later?
A: Yes, most solar battery systems are designed to be expandable. You can add more panels, batteries, or upgrade components as your needs grow. However, ensure all components are compatible and properly sized for the expanded system to avoid performance issues.
Q: What happens during cloudy days or winter?
A: Solar panels still generate power on cloudy days, though at reduced capacity (typically 10-25% of peak output). During winter months with shorter days, you may need to reduce power consumption or consider adding more panels to compensate for decreased sunlight hours.
Q: Do I need permits for a DIY solar system?
A: Small, portable systems typically don’t require permits. However, permanently mounted systems or those connected to home electrical panels often need permits and inspections. Check with your local building department and HOA before installation.
Q: How do I know if my system is working properly?
A: Monitor key indicators including battery voltage, solar panel output, and charge controller status. Healthy lead-acid batteries should read 12.6V+ when fully charged, while the charge controller should show charging activity during sunny periods. Keep a simple log of daily performance.
Q: What maintenance does a solar battery system require?
A: Clean solar panels monthly or as needed to remove dust and debris. Check battery terminals for corrosion every 3-6 months and tighten connections. For flooded lead-acid batteries, check water levels monthly. Inspect wiring and connections annually for wear or damage.
Q: Can this system power my entire house?
A: The simple system described in this guide is designed for essential devices and small appliances. Powering an entire house requires a much larger system with professional installation, multiple battery banks, and potentially grid-tie capabilities. Start small and expand as you gain experience.
Q: Is it safe to build this myself?
A: Yes, when following proper safety procedures. Always wear protective equipment, double-check connections, and never work on live circuits. If you’re uncomfortable with electrical work, consider having critical connections made by a qualified electrician while doing the simpler assembly work yourself.
Q: What if I make a mistake in wiring?
A: Common wiring mistakes include reversed polarity or loose connections. Always use a multimeter to verify connections before energizing the system. Install appropriate fuses or breakers to protect against overcurrent situations. When in doubt, consult online forums or seek professional advice.
Q: How do I calculate if solar is worth it in my area?
A: Research your area’s average daily sun hours and electricity rates. Multiply your daily energy needs by local electricity costs to find potential savings. Factor in system costs and payback period. Online solar calculators can help estimate performance for your specific location.